Little Gem part 3.1: Cab planning

After I completed my first Little Gem build, I was still uncertain whether I liked the design or not. I had used an ultra-cheap, tiny speaker, and damaged it when installing it– so would it sound better with a better speaker? Could I squeeze out more headroom? (headroom is a term for being able to crank up an amp’s volume and still not distort the sound– useful for some players, but not for others. I prefer more headroom than your average heavy metal shredder, who might have little use of a clean tone.)

I decided that the only way to really be able to test the amp and to compare other modifications and mini-amp designs was to build a capable cab (speaker cabinet), and use it to test the designs I build. But how to build a cab?

I decided not to buy a cab, because the cheapest ones I could find ran $130+, and were butt-ugly. Surely I could build something better? But how? After checking out Shavano Music Online, DIY Guitarist, Duncan’s Amp Pages, and this page, I had a feel for what I needed to to, and that I was capable. I just had to figure out exactly what I wanted.
Speakers are a big deal. I remember as I was first shopping for amps discovering that the speakers that make good guitar amps are somewhat specialized. Modern speakers are fantastically well made– they can reproduce almost the full range of sounds humans are capable of hearing, with perfect clarity, and without ‘coloring’ or altering the sound of the music they reproduce. For guitar amps, this sucks.

Because guitar amps are supposed to create tone, not reproduce it.

One of the reasons that older, vintage amps are so prized, is that speaker technology 40 years ago sucked. Speakers created warmth and color because they were not as well designed as those of today, from a hi-fi perspective.
Beavis Audio has a project page on a pair of cabinets made from wooden trashcans (have I mentioned that Dano’s a freakin’ genius?). This is where I realized that I didn’t have to go all out and learn a bunch of difficult carpentry skills. It’s also where I learned about Weber Speakers. Weber makes speakers with all the design ‘flaws’ that make guitar amps sound great. They’ve got a huge selection, as well as amp & cab kits, and lots of info for anyone trying to understand how amps & speakers work, particularly regarding the tricky subject of impedance.

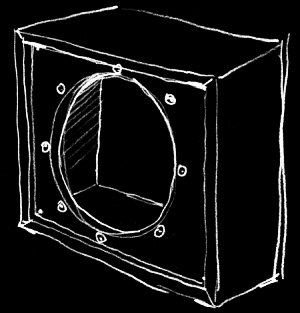
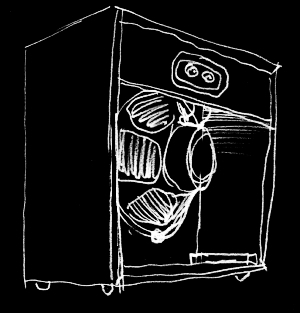
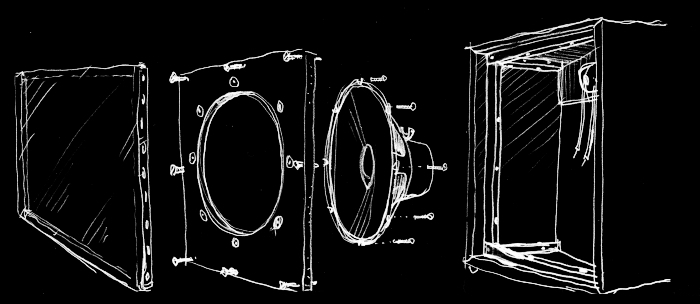
I ordered one of their 8″ ‘Signature’ Speakers. An alnico for $35. I quickly sketched up a design for a box, 15″ on a side and 7″ deep. Off to the hardware store! Cabs are usually covered in carpet or ‘tolex,’ a kind of leatherette. I didn’t want to bother with this, which meant I had to choose nicer-looking wood than is often used. I found 1×8 hemlock for an ok price. For the baffle (the panel that the speaker mounts to), I bought 3/4″ particle board, a 1/4 sheet. Now personally, I hate particle board. It’s heavy, ugly, and sucks moisture like a sponge. But it is flat, very flat. The Weber site warns against using a baffle that isn’t perfectly flat. They use steel baskets (the frame that supports the speaker cone) that are very thin, and bolting them to a slightly warped baffle can bend them out of shape, causing a ‘rub’ (where the coil rubs against the magnet), which can result in ugly noise, and eventually fire. This is bad. So, particle board for the baffle. Ugh. I grabbed T-nuts and matching screws for the mounting, a box of wood screws, and furring strips (strips of straight wood with a 3/4″ square cross-section.

At Radio Shack I picked up speaker connectors, a kind that accepts both banana plugs and bare wire. I had a scrap of plywood for a panel to hold the connectors. At a nearby fabric store I picked up a yard of speaker cloth, after a fair bit of trouble. The gals there didn’t know what ‘grille cloth’ was, and were apparently irked that a big ugly male had invaded their store looking to spend money, completely oblivious to their esoteric rituals and methods (I thought I was going to be kicked out when I produced a coupon at apparently the wrong time). It took a bit of talking before they finally sold me some speaker cloth, which is not as attractive as grille cloth, but would serve the purpose.

With all my materials in hand, it was time to come up with a plan, and build the damn thing, which I’ll cover in the next post.
Little Gem part 2: Combo

The Little Gem is very simple. It uses a tiny chip called “LM386-N” that does most of the work. A few capacitors help shape the tone, a potentiometer controls gain, and a rheostat for volume. With just a 9 volt battery, it’ll run an 8-Ohm cabinet– folks have bragged online that they’ve powered a 2×12 cab– that’s 2 twelve-inch speakers. I wouldn’t have thought it possible, until I built my own.

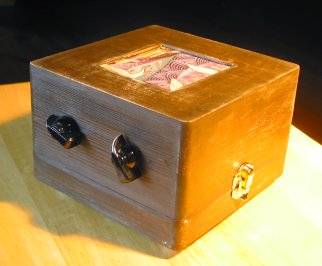
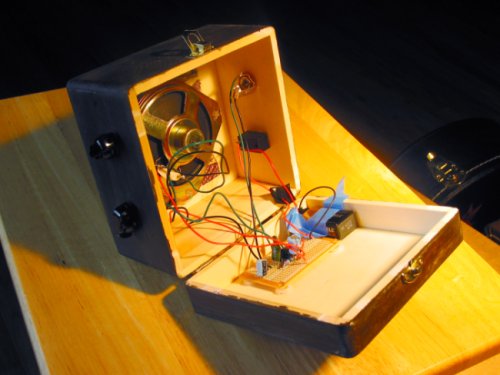
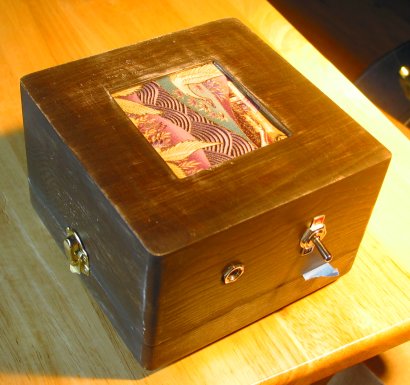
My first version of the Little Gem is a combo. Rather than use a crackerbox like Make, I picked up a little unfinished wooden box at the local craft store. Parts I picked up at a local electronics retailer, and Radio Shack (Rheostats are hard to find these days, the only place in my town to carry them was Radio Shack). The box is 6″ wide, 6″ deep, and 3.75″ tall. I bought a 4-inch 8-Ohm speaker that would fit nicely. I have no idea what the intended purpose of the speaker is, but I found it amongst other equipment for security systems. So it’s probably only supposed to be used to make an alarm wail. Fortunately, that pretty much is the range of my playing ability, so I didn’t expect any trouble.

As I mentioned in the previous post, the Make approach to the Little Gem uses a “prototype board” as the platform for the components. A prototype board is a little piece of perfboard that has traces glued to it in a useful pattern: 2 long columns down the center, and small rows connecting 2 perf holes at a time running perpendicular. One of the columns is wired to the positive terminal of the power source, the other to the negative. This way, any component that needs to go to ground (which is most of them) just needs to connect anywhere along the negative column. And anything needing power connects anywhere on the power column. Simple and logical. I never would have thought of it.

Another bit mentioned in the Make article was the use of a socket for the amp chip. Taken for granted by all the folks at Runoff Groove, I’m sure, but not something I would have thought of on my own. The socket is soldered to the board, and then the chip is just inserted– this way you don’t run the risk of cooking the chip while trying to solder connections to it. I also found the socket useful for another reason on my second build. More on that later.

Using the circuit diagrams and schematics provided by Make and Runoff Groove, and this perfboard layout drawing on flickr, I soldered all the connections, and gave it a quick test. Success! I had noise! Time to mount everything in the box. After initially screwing up the nice finish I had going on the box, I went for a more distressed look. It’s far easier to make something look like a piece of crap than it is to make something nice neat and shiny. Go figure. I drilled holes for the switch, input jack, and controls, and cut a ragged square out of the bottom for the speaker. I decided to mount the speaker to the bottom, and just turn the box over. At the time I was thinking that the larger mass of the box bottom might anchor the speaker better, and not create extra noise, but that’s probably just magical thinking.

The pots are designed to mount to a sheet of metal or plastic, no more than 1/8″ thick. The box’s sides are 1/4″ inch thick. I used files and patience to ‘shallow out’ the box walls around the mounting holes, so that the pot and rheostat would stick out far enough for their threads to accept the nuts that anchor them down. Next time, I’ll make a control plate or something. This part was a pain in the ass.

I stole a scrap of fabric from my wife’s collection scraps-for-quilts to mask the speaker through the hole. Pretty, isn’t it? I hot-glued plastic washers to the inside of the box to act as ‘standoffs’ to keep the perfboard and speaker from pressing directly against the walls. Then hotglued the perfboard and speaker down.

I had forgotten to buy a clip to secure the battery. So I taped it down. Wouldn’t want it rattling around in there, I’m a beginner at soldering, and some of those joints in there will probably snap easily. Chickenhead knobs and rubber feet added a nice finishing touch. Then it was time to play!

How did it sound? Pretty good, considering who built it, the cost of the components (~$25), and the fact it was powered by a 9 volt, of all things. But not great. For one thing, this design does not do clean. The only way I could get a clean tone was to turn the volume way down, where it could be drowned out by normal conversation. But distorted? Fuhgetaboutit! It sounded almost like my brother’s Pignose. I had accidentally dripped hot glue on the speaker cone as I was mounting it to the box– and thought I was out $4. But then I remembered how Link Wray used to claim he ‘d poke holes in his amp’s speakers with a pencil(Fender amps! the vandal!) to get that awesome distortion of his, so I figured hot glue couldn’t hurt too much. Maybe it colors the sound, who knows? I haven’t heard this particular speaker without hot glue on it, so… maybe it’s an improvement.

Here’s two .ogg files that will give you an idea of how it sounds (and an even better idea of how badly I play).

LGcomboWCM.ogg – this is as clean as I can get it. Not very.
LGcomboBB.ogg – this is with the gain all the way up. Rock out!

I decided that I’d never know how good or bad this amp design was without hearing it through proper speakers… and that led to my next build, coming in the next post.

Little Gem part 1

After I built my partscaster, I decided I needed to try something that didn’t involve hours of spraying laquer or buffing. Something that didn’t require me to be an obsessive neat-freak; a trait that runs counter to my nature. Why not effects pedals?

I found several sites online that had info to get me started. Beavis Audio was fascinating, but a bit over my head, as the last time I worked with electric circuits was back in high school (except for wiring my guitar, which was not really difficult, and did not require any understanding of what really goes on in those components). From Beavis Audio I found Runoff Groove, a treasure trove of schematics for various guitar effects projects, complete with sound samples and links to purchase kits of the designs. I was torn– which kit to buy? I couldn’t read schematics, and even the ‘perfboard layouts’ left me with more questions than answers– so I thought there was no way I’d be able to get started without a kit with very detailed instructions.

They have a project at Runoff Groove called the “Little Gem,” a tiny guitar amplifier that runs off a 9 volt battery. Their design assumes that it will be built as a ‘head’, that is, just the amplifier, with no speaker attached. Heads are connected to ‘cabs,’ or speaker cabinets (An amp with a built in speaker is called a ‘combo’). As I had no cabs lying around (I only owned a single amp– a combo), I figured I’d have to pass on the Little Gem, at least for a while.

But then volume 9 of Make Magazine arrived. In it, they had a HOWTO article on the Little Gem! They built it as a combo, using a cracker box as a housing! They lay out the circuit on a ‘prototyping board’ which makes interpreting the schematic much easier. The article, and accompanying materials I found online were complete enough to give me the cojones to try it out.

More about the Little Gem and about my first attempt to build one in the next post!

Sooner or later…

…I’ll get around to some of the things I’ve promised. Last year I built a ‘partscaster’: a telecaster-style guitar assembled from parts that I bought or ordered online. A local luthier helped me with the finish, and it sounds amazing. I’ll post a more in-depth look at the process– probably not step-by-step, since most of my photos of the progress are crap.

Lately I’ve been tinkering with other stuff– tiny guitar amplifiers, effects pedals, and a speaker cabinet. I’ll post more info as I deal with this procrastination problem.

“Every day, and in every way, I’m getting better, and better!”