Little Gem part 4: Head Building

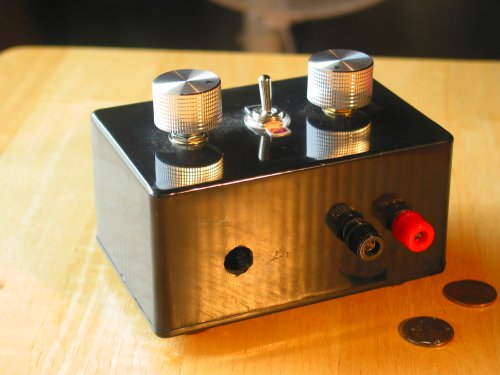
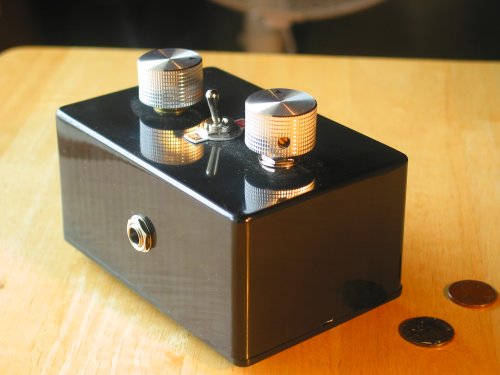
So I had a cab all set; time to build a head version of the Little Gem and hook it up. Capacitors, resistors & the amplifier chip come several to a package, so I didn’t have to buy the whole parts list again, just a pot, rheostat, the polarized resistors, prototype board, knobs, switch and a box to put them all in. I picked up an inexpensive plastic ‘project box’ at the local electronics parts store. It’s about 5″ wide, 3″ deep and 3″ tall. I went with plastic because I didn’t have drill bits* capable of drilling through metal in any short amount of time. I also bought a dc plug, thinking I could run this head on an old 9 volt adapter I have left over from an effects pedal.

The build went smoothly, up to a point. It tested fine on the battery I’d installed, but when I plugged in the wall wart, I got nothing. Zilch. No sound, no nothing. I unplugged the wall wart, and went back to the battery. Still nothing.


See the gaping hole where I had to remove the DC plug?

Now, remember a few posts ago I mentioned another benefit of using sockets for your amplifier chip rather than soldering the chip directly? Here it is. Since I had a hunch I’d damaged my chip, and I had an extra chip (they come in packages of 3), I quickly swapped the chip out by prying it out of its socket with my thumbnail. Had I skimped on the socket, I would have had to desolder the whole thing (8 connections) running the risk of burning up the chip if it was ok on each joint, and then have to solder in a whole new chip.

With a fresh chip in place I tested the head with the battery, and it sounded out nice and loud. So obviously I’d burnt the chip when I plugged the amp into the wall. After a little research, it became obvious what I’d done. I’d bought a 2-lug dc plug. If you look at the stompbox wiring page at Beavis Audio, you’ll see that his dc plug has 3 lugs. This kind of plug doubles as a switch– when the wall wart plugs into this socket, it automatically switches off the flow of current from the battery. My 2-lug plug did not do this, and was in fact wired in series with the battery. So when I plugged it into the wall, I was running adapter current PLUS battery current, about 18 volts, through a chip rated for only 9. So, yeah, I burnt the chip. Luckily, they’re cheap.


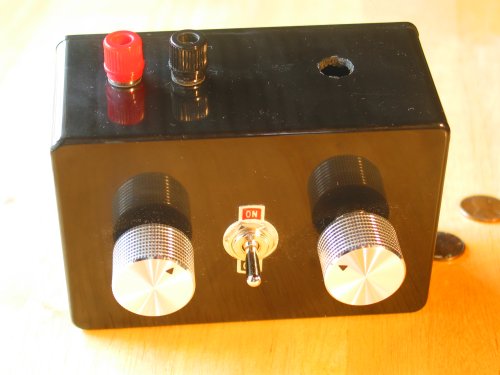
These switches come with these little labeled washers. Useful for when you don’t want to wire a led to let you know when it’s on.

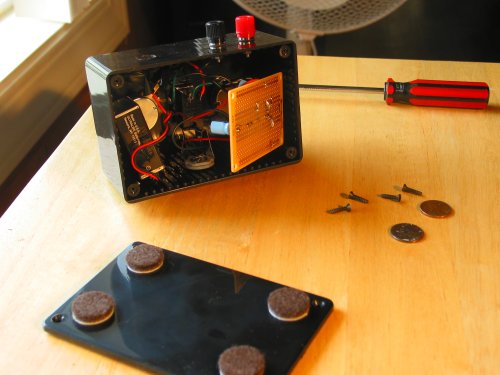
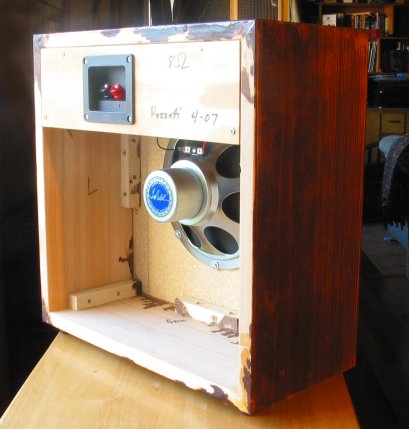
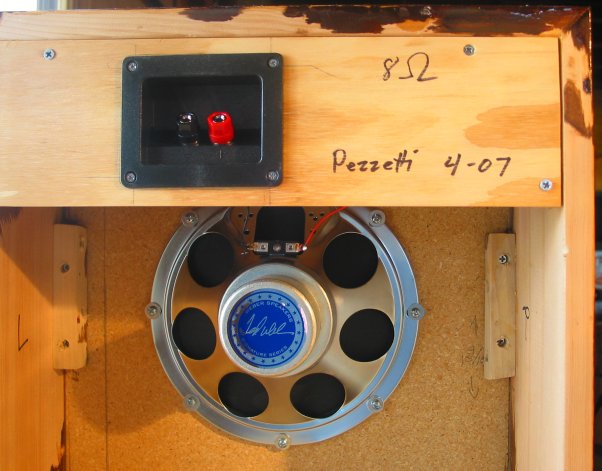
It’s a bit crowded inside, but only because I’ve been pretty sloppy with the wiring so far. Got to work on that.

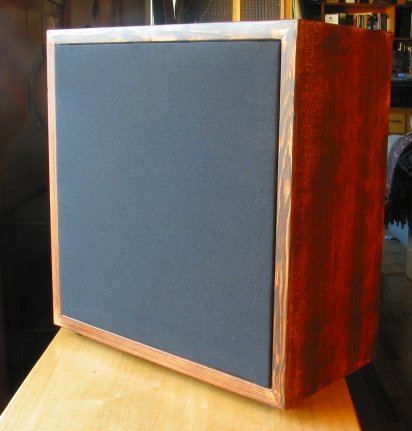
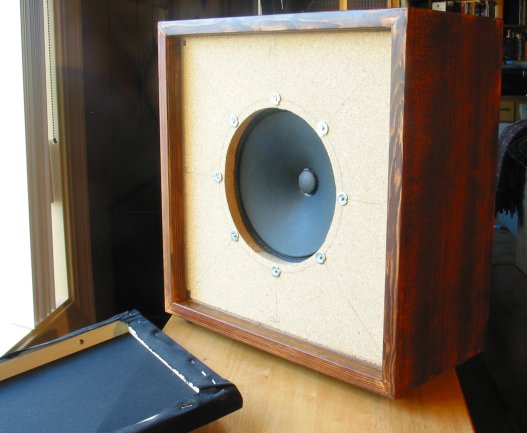
Here are two samples of the Little Gem’s sound, in .ogg format. The cabinet is sounding great, nice and warm. Both are played on my partscaster, with the neck and bridge pickups mixed together.
Middle of the Road-ish – about as clean as it gets
Sunshine of Your Wub – Gain up about 3/4 of the way

* Actually, according to my old shop teacher, a ‘drill bit’ is the clamping part of the tool that holds the actual boring device, which should be called the ‘drill.’ The motor that turns the bit and drill assembly is, surprisingly enough, the ‘drill motor’. I grew up calling the drill a bit, the bit a chuck (the chuck is actually a specific part of the bit), and a drill motor a drill. That’s as may be, but every time I go the hardware store and ask for ‘drills,’ they take me to the ‘drill motors.’ Really, most of the time it doesn’t pay to be pedantic.

Little Gem part 3.2: Cab Building

As you can see from the drawings in the previous post, I had some idea of what I wanted. The consensus among audiophiles is that finger-jointed cabinets and amps are the best sounding. They also are difficult to build well, and my inability to saw a straight cut rules them out.

I also lack the most basic tool in a carpenter’s shop. My wife won’t let me buy a table saw, because in her line of work (medical) she sees many examples of table saw related accidents, and is convinced I would not keep my thumbs for very long should I be left in the same room as one of these diabolical machines. But evil though they may be, they are extremely useful, and I often have cause to curse my wife’s concern for my safety and low regard for my reserve of common sense. I am allowed a circular saw, though.

So, with limited tools and ability, I aimed for simple. Almost. Simplest would be to use butt-joints, but since I wasn’t going to cover the cabinet, butt joints would mean exposed end-grain, which I find ugly. So I set my circular saw to 45 degrees, and cut mitre joints. To get straight cuts with the table saw, I clamped one of my furring strips to the plank to act as a fence or guide for the blade. This helps, but it’s still difficult to get a truly straight cut. For this a mitre saw is better, but I don’t have one. After cutting the joint, I sanded and filed the edges to make them as smooth and straight as I could. Should use a plane for this, but don’t have one of those either. Rather than cut slots for biscuits, I screwed & glued the furring strips into the inside corners of the joints to make them stronger. Once together, the joints still showed gaps here and there– the cuts were not straight after all. I filled the gaps with wood filler.

I also used furring strips to support the baffle, and the panel on the back that would hold the connectors. Before mounting these parts I stained the wood– only to find that either I was using the wrong stain type or that my hemlock wasn’t too stain friendly– parts of the grain sucking stain up like a sponge, & other parts shedding it almost entirely, leaving a sort of tiger stripey feel, which I wasn’t really pleased with, but wasn’t ugly enough to cover with paint. After the stain dried, I sanded and gave it several coats of varnish, which I sanded & buffed– but only going up to medium grit buffing compound– which leaves the box with a semi-gloss or matte look. Basically, I just got bored buffing– it’s not a whole lot of fun, and with the poor stain, wasn’t aiming to make it look perfect or great, just ok was fine with me.

With the finishing out of the way, I cut the hole for the speaker in the baffle, using a jigsaw freehand. I actually got pretty close to circular, but it didn’t matter since I’d be hiding it behind my hard-won speaker cloth. I drilled holes for the t-nuts, and popped them into place. Then mounted the baffle to the furring strips with glue and wood screws. Every joint had glue and screws, the glue doing the real work, the screws really just there to hold the wood in place while the glue set. When the baffle had set, I mounted the speaker to it, with the face of the speaker pressing against the back of the baffle (t-nuts in front), to make use of the paper gasket on the face of the speaker. I used a jigsaw again to cut the hole for the connector panel, and mounted it with screws, and liquid nails, to reduce the possibility of getting a rattle or buzz caused by the speaker’s vibrations. I soldered the connectors to the speaker before I mounted the panel.

For the cover, I built a quick square frame using furring strips, glue and screws that was slightly (by about a 1/16″ – 1/8″ smaller than the opening at the front of the box. I made it smaller to allow space for the fabric to stretch around it. I stretched the fabric around the frame the same way you’d stretch a canvas for painting, but without pliers or a stretcher, because I needed to apply much less pressure– speaker fabric is very flexible, and anyway it didn’t have to be drum tight, it’s just there to hide the baffle & crooked hole cut in it. Since I had sized the frame just right, it fit snug in its place with no need to secure it. I screwed some plastic feet into the bottom (I had early decided which side was the bottom by determining which side was ugliest), and it was ready to test. I desoldered the leads running to the speaker in my first Little Gem, the combo, and connected them to the new cabinet to try it out.


What a difference a speaker makes! The same amp running through this larger speaker had only slightly more headroom, but much warmer, richer tone. And loud!

Now I had a cab, but had no head to run it. I put my combo back together, and got ready to build my first head, which I’ll describe in the next post…