
As you can see from the drawings in the previous post, I had some idea of what I wanted. The consensus among audiophiles is that finger-jointed cabinets and amps are the best sounding. They also are difficult to build well, and my inability to saw a straight cut rules them out.
I also lack the most basic tool in a carpenter’s shop. My wife won’t let me buy a table saw, because in her line of work (medical) she sees many examples of table saw related accidents, and is convinced I would not keep my thumbs for very long should I be left in the same room as one of these diabolical machines. But evil though they may be, they are extremely useful, and I often have cause to curse my wife’s concern for my safety and low regard for my reserve of common sense. I am allowed a circular saw, though.
So, with limited tools and ability, I aimed for simple. Almost. Simplest would be to use butt-joints, but since I wasn’t going to cover the cabinet, butt joints would mean exposed end-grain, which I find ugly. So I set my circular saw to 45 degrees, and cut mitre joints. To get straight cuts with the table saw, I clamped one of my furring strips to the plank to act as a fence or guide for the blade. This helps, but it’s still difficult to get a truly straight cut. For this a mitre saw is better, but I don’t have one. After cutting the joint, I sanded and filed the edges to make them as smooth and straight as I could. Should use a plane for this, but don’t have one of those either. Rather than cut slots for biscuits, I screwed & glued the furring strips into the inside corners of the joints to make them stronger. Once together, the joints still showed gaps here and there– the cuts were not straight after all. I filled the gaps with wood filler.
I also used furring strips to support the baffle, and the panel on the back that would hold the connectors. Before mounting these parts I stained the wood– only to find that either I was using the wrong stain type or that my hemlock wasn’t too stain friendly– parts of the grain sucking stain up like a sponge, & other parts shedding it almost entirely, leaving a sort of tiger stripey feel, which I wasn’t really pleased with, but wasn’t ugly enough to cover with paint. After the stain dried, I sanded and gave it several coats of varnish, which I sanded & buffed– but only going up to medium grit buffing compound– which leaves the box with a semi-gloss or matte look. Basically, I just got bored buffing– it’s not a whole lot of fun, and with the poor stain, wasn’t aiming to make it look perfect or great, just ok was fine with me.
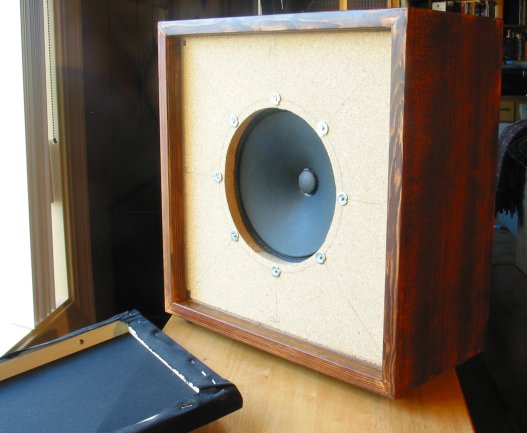
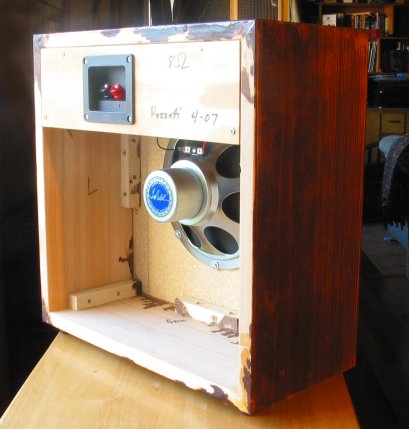
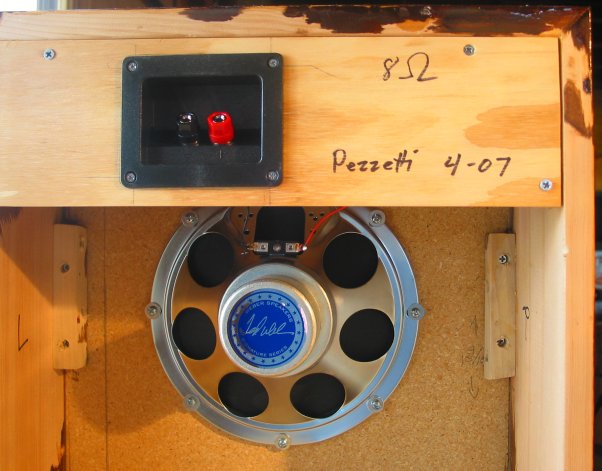
With the finishing out of the way, I cut the hole for the speaker in the baffle, using a jigsaw freehand. I actually got pretty close to circular, but it didn’t matter since I’d be hiding it behind my hard-won speaker cloth. I drilled holes for the t-nuts, and popped them into place. Then mounted the baffle to the furring strips with glue and wood screws. Every joint had glue and screws, the glue doing the real work, the screws really just there to hold the wood in place while the glue set. When the baffle had set, I mounted the speaker to it, with the face of the speaker pressing against the back of the baffle (t-nuts in front), to make use of the paper gasket on the face of the speaker. I used a jigsaw again to cut the hole for the connector panel, and mounted it with screws, and liquid nails, to reduce the possibility of getting a rattle or buzz caused by the speaker’s vibrations. I soldered the connectors to the speaker before I mounted the panel.
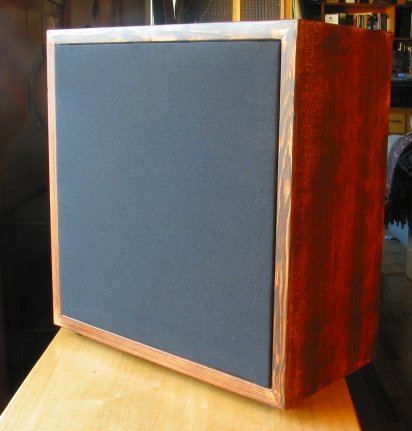
For the cover, I built a quick square frame using furring strips, glue and screws that was slightly (by about a 1/16″ – 1/8″ smaller than the opening at the front of the box. I made it smaller to allow space for the fabric to stretch around it. I stretched the fabric around the frame the same way you’d stretch a canvas for painting, but without pliers or a stretcher, because I needed to apply much less pressure– speaker fabric is very flexible, and anyway it didn’t have to be drum tight, it’s just there to hide the baffle & crooked hole cut in it. Since I had sized the frame just right, it fit snug in its place with no need to secure it. I screwed some plastic feet into the bottom (I had early decided which side was the bottom by determining which side was ugliest), and it was ready to test. I desoldered the leads running to the speaker in my first Little Gem, the combo, and connected them to the new cabinet to try it out.
What a difference a speaker makes! The same amp running through this larger speaker had only slightly more headroom, but much warmer, richer tone. And loud!
Now I had a cab, but had no head to run it. I put my combo back together, and got ready to build my first head, which I’ll describe in the next post…
Looking nice! Build me one!!!
Did you see the post I did a few days ago on Jerry Garcia’s auction, where I mentioned the little tie-dye speakers reminded me of your other Little Gem?
Be cool
IG
Build your own! :)
I saw your post, but wasn’t able to bring up the image of the speakers. Thanks for the mention, I appreciate it.
pezzetti
Tell your wife that you are in far more danger trying to use the wrong tool for the job than if you had the right tool. Clamping down the wood and going at it with a circular saw in your hand … that sounds much more dangerous.
I always have to chuckle when grown men say they’re not “allowed” to do something.
Thank you for your comments! As to the first point, clamping a ‘fence’ to use as a guide for the circular saw is safe, as long as the saw is used properly. Of course, table saws are safe as long as they are used properly. But it’s not a matter of what’s safe or not, it’s a matter of my wife’s perception, which brings us to your second point…
Marriage is a negotiation, and you have to pick your battles. This is one I haven’t picked yet. :) And if I may wax philosophical for a moment, none of us are truly free. I can think of many things that grown men aren’t allowed to do, including things far more innocuous than owning a table saw. :)
I've been searching around the internet for different homemade amps and such, and this is probably the best I've come across! I am looking into building some amps for myself, but as of yet I haven't done any work like this. Do you think this kind of project is too difficult for a beginner, and I should start with a smaller amp first?
If you've never soldered anything ever before, then I recommend starting with the basic Little Gem design, as it doesn't have any delicate transistors to solder, and is a great project to learn the basics. If you've got some experience with a solder gun, go straight for the Ruby. It's still a very simple design, but it sounds much better. Have fun!